If you are wondering how to connect Alexa to WiFi, then you arrived at the correct destination. Here we will provide you with an easy and effective guide for the same.
Alexa is a smart virtual assistant that happily responds to your voice commands. It can also perform small virtual tasks like playing music, answering questions, setting timers or alarms, and more.
However, there are many users who are unaware of how to connect Alexa to WiFi, especially those who are using the Echo device for the first time. If you are also one of those, then there is no need to get upset.
In this article, you will be provided with straightforward and effective methods for how to connect Alexa to WiFi, with or without the app. Connecting Amazon Alexa to WiFi is not a complicated task, it is more simple than you think.
If you are unable to do this on your own and unable to find out how to do this. Then follow the below-given instructions to connect your Amazon Alexa device to the WiFi network.
Why Does Alexa Need a WiFi Connection?
To confirm the proper functioning of Amazon Alexa, a substantial and persistent internet connection is necessary. It is necessary to have a reliable internet connection, as it allows the device to perform the given tasks appropriately.
If you don’t have an internet connection or your WiFi connection is weak and unstable, then you will experience response delays. For drop-in, calling, and messaging, a strong bandwidth is needed.
Therefore, for a seamless experience, you should ensure that your Echo device is connected to a reliable internet connection. Without a WiFi connection, you can use Alexa as a Bluetooth speaker only, not more than that.
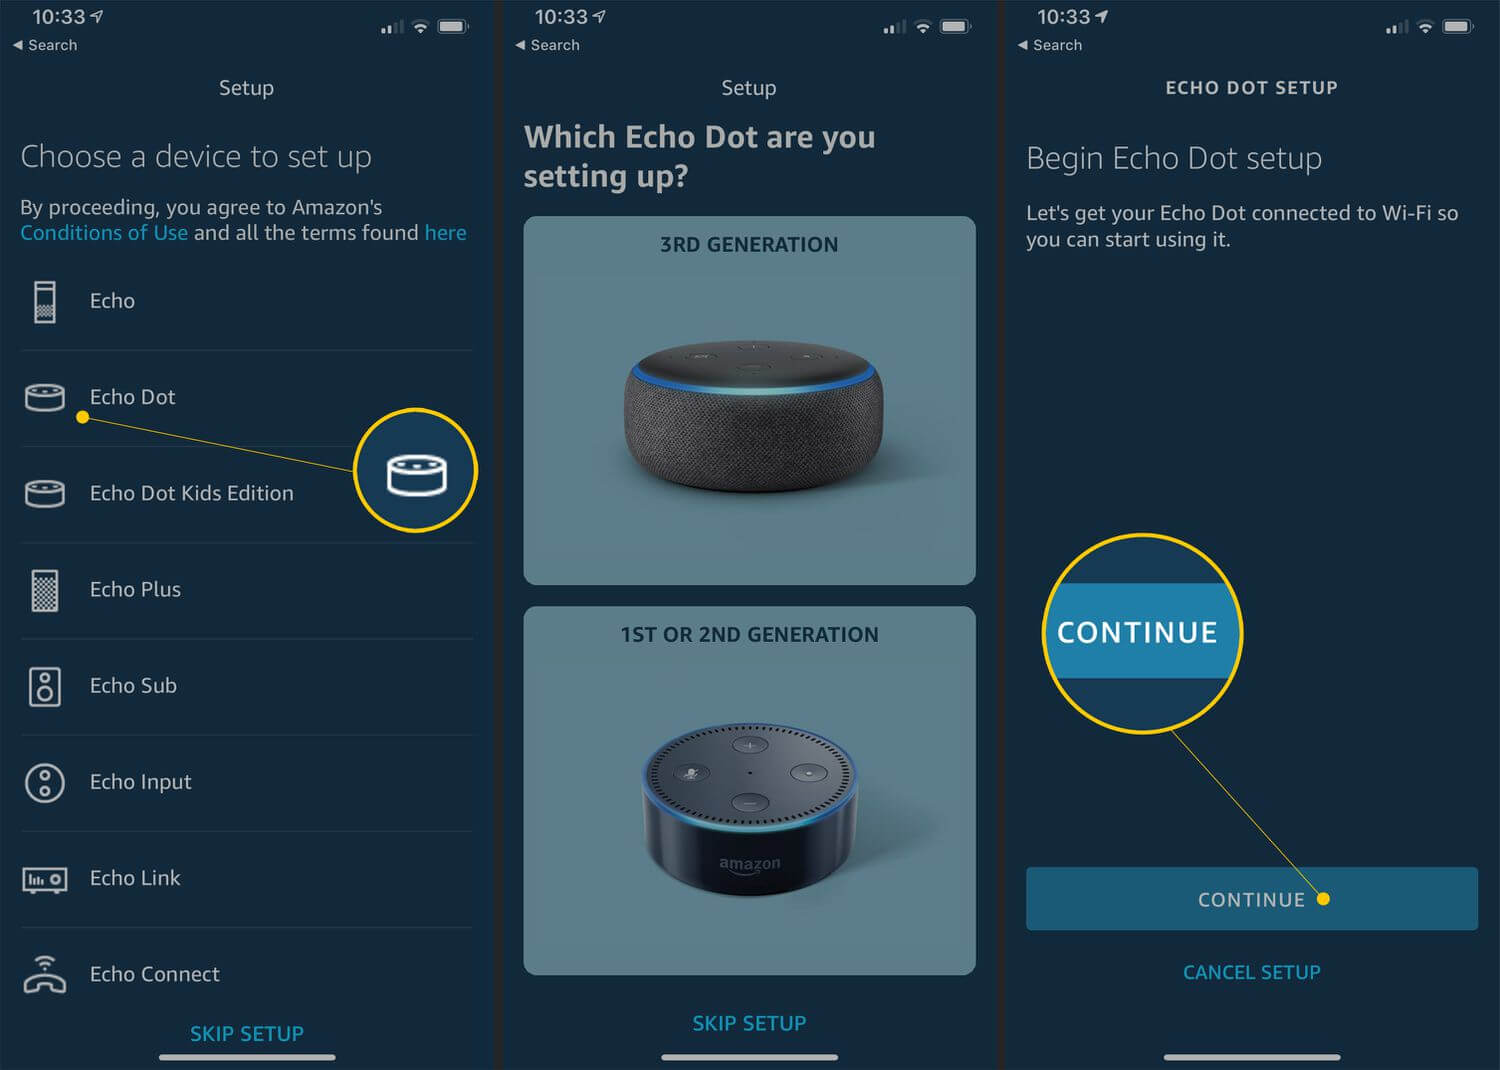
Steps to Connect Alexa to WiFi With the Amazon Alexa App
Well, now you have understood why an active and working internet connection is required for Alexa. Now you need to get familiar with the steps of how to connect Alexa to WiFi, with or without the app.
The process of connecting the voice control device to the WiFi is the same, whether you do it for the first time or the second time. Below are the steps to connect Alexa to WiFi via the app.
1. Download and Launch the Alexa App
Before you connect the Echo device to the WiFi, you need to install the Alexa app on your phone. You can easily get it from the App Store or the Google Play Store.
When the app is downloaded, you need to sign up with your Amazon Alexa account. Ensure that, you use the correct login credentials i.e., username and password.
2. Find Your Amazon Echo Device
Once the Amazon Alexa app gets downloaded, and then open it on your device. After this, wait for some seconds, so that it detects your new device. If you get the pop-up, then click on “Continue.”


If in case, you didn’t get the pop-up, then you need to find your device manually. For this, choose “More” at the bottom, and click on “Add Device.”
After that, choose “Amazon Echo”, and then the device type you are using. Now if the orange light appears on the Device, then simply click on “Yes” in the app.
If you don’t see the Orange ring, then you need to put it in set-up mode. After this, click on “Yes” on the app. Now you have to choose your device from the available devices list.
3. Connect Alexa to WiFi Network
After finding the device, you need to connect it to your home’s network. The app will automatically pick the network if the connection is saved in your account.
If it won’t then you can also do this manually as well. After that, click on “Continue”, then a pop-up will appear on the screen. With this step, you have connected Alexa to WiFi with the app.
Steps to Connect Alexa to WiFi Without App
You can also use the official website to connect your device to the internet connection. Below are the instructions for how to connect Alexa to WiFi without Amazon Alexa App.
1. Visit the Official Website of Alexa
There are numerous reasons for not connecting the Echo device through the Amazon Alexa app. So, to connect it without the app, open the web browser on your device. After that, search for “alexa.amazon.com” and click on the “Enter” button.
2. Search for your Device
After you head over to the official website of Alexa, you need to locate your device. To do this, in the left menu bar click on “Settings” and choose “Set Up a New Device.” Then you have to choose your Echo device and click on “Continue” to begin the setup process.
3. Check your Echo Device
If you see the orange light on the device, then click on “Continue” on the app. This light shows that it is in setup mode. If you won’t see the orange light, then click on “Don’t See the Orange Light Ring.”
4. Connect Amazon Alexa to the WiFi
Now you have to select a WiFi network, which is named Amazon-XXX, for instance, and click on “Continue.” After this, you have to choose the network you want to connect to and fill in the password.
When you choose the network, then wait for a couple of minutes, until it audibly confirms the connection. Once it is confirmed, that means you have connected the Alexa to the WiFi network successfully.
Sum Up
The process of connecting Alexa to WiFi is quite straightforward, whether it is via the app or without the app. Go through the above instructions as given to connect Alexa to WiFi without App.
Hopefully, the above simple and easy guide will assist you with how to connect Alexa to WiFi, with or without the app. So, before you ask for assistance, you should follow the given comprehensive guide.