Want to take a screenshot on Mac?, but wondering how to do this. Then you arrived at the right place. In this article, you will get a brief guide on how to screenshot on Mac.
A screenshot is a digital image that captures the current display on a device. And being able to take a screenshot on Mac is a worthwhile skill. Users take screenshots to report an error message or share a chat conversation.
But many users don’t know how to screenshot on Mac. If you also belong to the same category, then there is no need to get upset. Although Mac has everything you require to take screenshots, the procedure is not so straightforward.
However, taking a screenshot is not a complicated job, it is more simple than you think. All it might need is a little workaround. The below instructions will assist you in taking screenshots on Mac.
If you are unable to do this on your own, then the following instructions will definitely help you out. Follow the below instructions to take a screenshot on the Mac device.
Steps for How to Take a Screenshot on Mac
Taking a screenshot is the most immediate way to capture the screen. Mac allows you to capture screenshots quickly. No matter whether you take an entire screen or just a portion. Here are the steps for how to screenshot on Mac.
1. Capture the Entire Screen
To take the entire screen, screenshot on Mac press and hold the “Command”, “Shift”, and “3” keys at the same time. Through this, you will be able to take the screenshot of the entire screen.
Once the screenshot is captured successfully, then you will see a floating thumbnail, at the lower right corner of the screen. To let it slip away on its own, you can swipe the thumbnail away.
It will be saved to the desktop by default. You can also click the thumbnail to open it for editing. By this, you will be able to crop the screenshot, draw or type on it, or share it effortlessly.
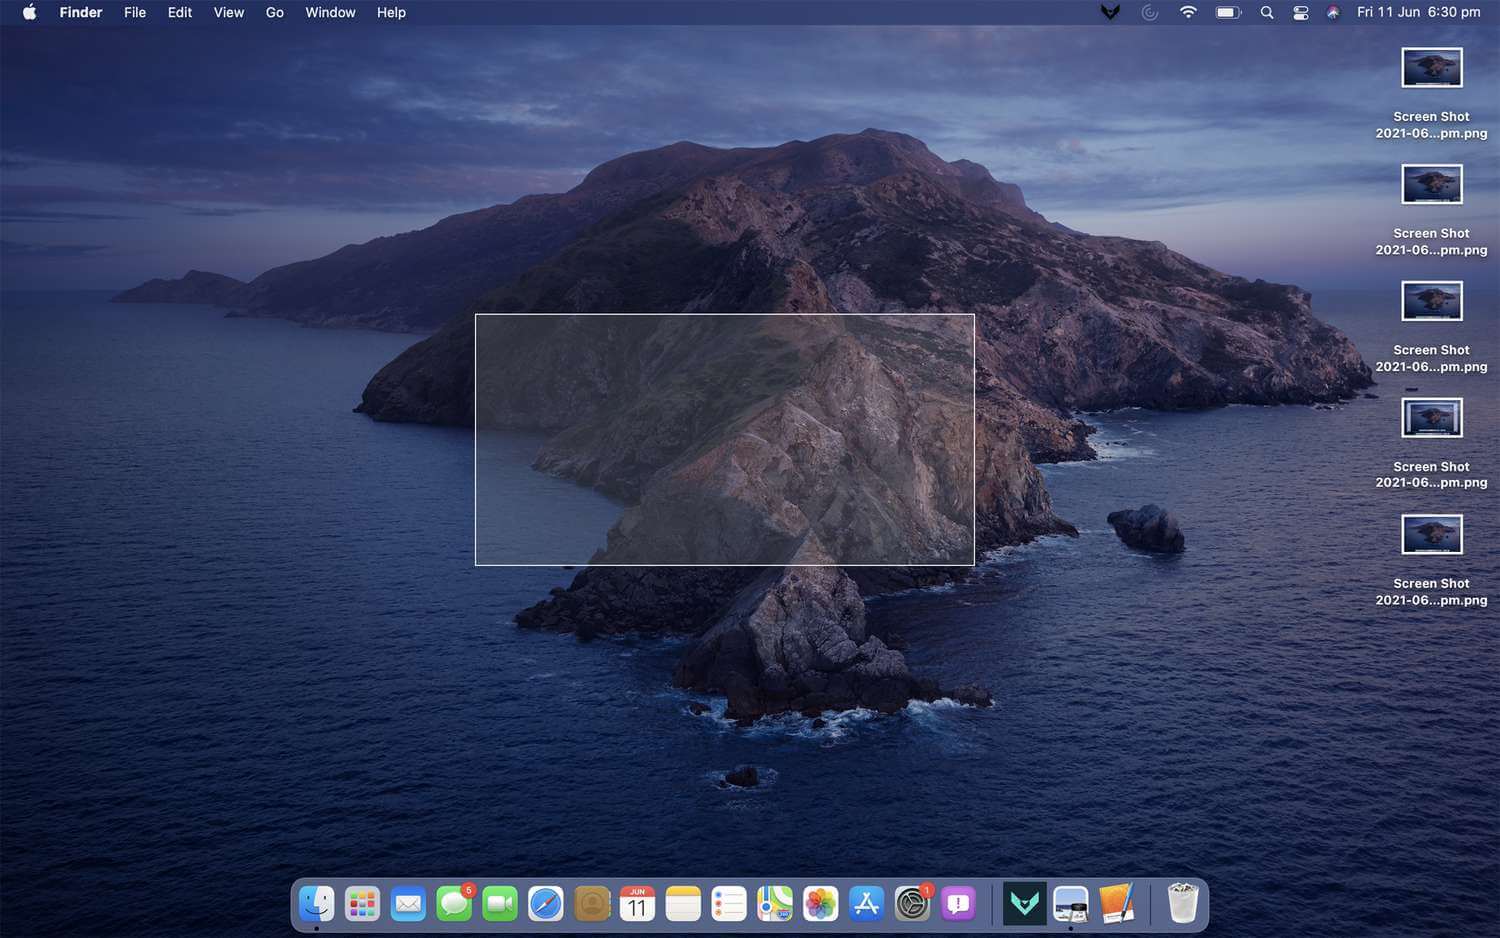
2. Partial Screenshot
By pressing and holding the “Command”, “Shift”, or “4” keys altogether, you will be able to take a screenshot on Mac. After pressing the mentioned keys, the mouse cursor will become a crosshair. Simply drag it to the area where you want to take a screenshot.
Once accomplished, remove the mouse button to grab the screenshot. Now you will see a thumbnail at the corner of the screen. Then click on it, if you want to edit it more or wait for some seconds for a screenshot to save to the desktop.
3. Capture a Specific Window
To capture a particular window, first open that window you want to capture. Then press the “Command”, “Shift”, “4”, and “Space Bar” keys at the same time. Then the mouse cursor will now become an icon.
After that, click on the Minecraft window to capture it. Now you will see a thumbnail, located in the corner of the screen. If you want to edit the screenshot or wait for the screenshot to save to your desktop.


How to Take Screenshot on Mac Using Touch Bar?
Mac also allows you to take screenshots using Mac Pro with a touch bar to quickly take a screenshot by clicking the button. Here are the steps to take a screenshot on Mac using the touch bar.
- First, visit the Control Strip of the system section of the System Preferences menu and choose Screenshot.
- Now to add a screenshot to the touch bar, use the Customize Control Strip button.
- After this, when you click on the screenshot on the touch bar, You will be able to capture the desired portion, window, or entire screen.
- The screenshot you will take will be captured on your desktop.
Steps to Capture the Screenshot of the Touch Bar
If you are willing to take a screenshot of the Touch bar and thinking about how to take a screenshot on Mac. Then fortunately you can also accomplish this effortlessly. All you need to do is, press the “Command”, “Shift”, and “6” keys at the same time, to capture the entire Touch Bar. Furthermore, keep the screenshot on your desktop.
How to Screenshot on Mac with the Built-in Screenshot Menu?
Mac also has a built-in screenshot menu on Mac OS Mojave or later. It lets users take screenshots and record the screen of their Mac quickly. This means if you have access to Mojave, Catalina, Big Sur, or Monterey.
Then you can easily access the built-in screen-shot. To do this, just have a look at the following instructions.
- On the keyboard, press the “Command”, and “Shift + 5” keys to launch the screenshot Menu.
- Now the screenshot menu will appear at the bottom of the screen. In this, you will also get several options for taking a screenshot on a Mac.
- It also includes capturing the entire screen, a specific window, or a selected area.
- From there choose the option you want to use to take a screenshot. So, if you capture a specific window or the selected area, the cursor will change to a crosshair.
- Now click and drag the crosshair to select the area you want to capture. Now when selecting the area you want to capture, release the mouse button.
- After that, the screenshot will be taken and appear at the right-bottom of the screen for a few seconds.
- At last, click on it to edit it further or let it go then it will be saved to your desktop.
Methods to Screenshot on Mac with Preview
The preview option is a built-in app on Mac that lets you view and edit a wide range of file types. It also includes images, PDFs, and documents. Moreover, it is a versatile tool that can help you to take screenshots.
Preview allows you to capture screenshots from the entire screen, a selected area, or a specific window. The difference is that the preview lets you name the file before saving it to your preferred location. Here is how you can preview screenshots on the Mac.
- Launch the window or screen that you want to capture and launch the preview app on your Mac.
- Then open the File menu, click on Take Screenshot, then choose from the selection, from the window, or from the entire screen according to your preference.
- Once you have successfully captured it, you can edit it by cropping it. Adjust the color and contrast or add annotations.
- After that, in order to save your edit screenshot, go to the File menu and choose the option Save.
Steps to Take Screenshots on Mac with Awesome Screenshot & Recorder
If you have a heavy need for a screenshot capture annotation. It can be used in both Windows and Mac with any of the four browsers installed. The following guide will assist you in taking screenshots on Mac using Awesome Screenshot & Recorder.
- Download the Awesome Screenshot extension to your browser and sign into it.
- Then launch the window page you want to capture. After that, click the Awesome Screenshot extension on the toolbar to launch it.
- Now click on Capture and choose to take the screenshot from the visible part, full page, selected area, and the entire screen.
- With this, you have successfully taken the screenshot. Open it on the new tab and edit it according to your requirements.
- Once edited, click on Done to upload it to the cloud. You also have the option to download it locally.
Top Best Screenshot Apps for Your Mac
If you want to do more with your screenshots and perhaps you want to share them instantly or add annotation. Below are some of the most suitable devices for capturing outstanding screenshots on your Mac.
1. Snagit
Snagit is a robust screenshot app for Mac known for its comprehensive set of features. Its powerful editing tools include annotations, arrows, and callouts, providing users with the ability to create professional-looking screenshots.
The app also supports video recording, making it versatile for various capture needs. Snagit excels in panoramic and scrolling capture, allowing users to capture entire web pages or documents seamlessly.
Pros:
- User-friendly interface.
- Robust editing features enhance creativity.
- Comprehensive capture options cater to diverse needs.
Cons:
- Premium pricing might be a deterrent for some users.
2. CleanShot X
CleanShot X stands out with its sleek and intuitive interface. It offers advanced annotation tools and markup options, allowing users to customize their screenshots effectively.
The app provides GIF and video recording features, and its integration with cloud storage simplifies the sharing process. CleanShot X also supports customizable keyboard shortcuts for a personalized capture experience.
Pros:
- Sleek and intuitive interface.
- Advanced editing tools for precise customization.
- Quick sharing options with integrated cloud support.
Cons:
- Subscription-based pricing might be considered a drawback.
3. LightShot
LightShot is a lightweight and fast screenshot app designed for simplicity. Its straightforward interface makes it easy for users to capture and share screenshots quickly.
While it offers basic annotation tools, LightShot focuses on efficiency and speed, making it an excellent choice for users who prioritize simplicity.
Pros:
- Lightweight and fast operation.
- Free to use, making it accessible to a broad user base.
- Cross-platform compatibility (also available for Windows and Linux).
Cons:
- Limited editing features compared to more advanced options.
4. Monosnap
Monosnap is a feature-rich screenshot app with a focus on collaboration. In addition to standard annotation and editing tools, Monosnap offers cloud storage integration and real-time collaboration features.
The app supports video recording and provides a free version for users with basic needs.
Pros:
- Collaboration features enhance teamwork.
- Free version available for cost-conscious users.
- Cross-platform compatibility ensures flexibility.
Cons:
- The interface might be overwhelming for some users.
5. Jing
Jing is a straightforward screenshot app with basic capture and video recording capabilities. While it might lack some advanced features found in other apps, Jing is free to use and integrates seamlessly with other Tech products, providing a cohesive experience for users familiar with their ecosystem.
Pros:
- Free to use, making it accessible to a wide audience.
- Straightforward interface for quick and simple captures.
- Integration with other Tech products.
Cons:
- Limited features compared to more sophisticated alternatives.
Sum up
Taking screenshots on a Mac is a versatile and straightforward process, with built-in tools catering to different needs. Whether you prefer keyboard shortcuts, specialized utilities, or third-party apps, the choice depends on your workflow and the level of customization you require.
Experiment with the methods outlined in this guide to find the one that best suits your preferences, and elevate your screenshot game on your Mac.