How to AirDrop from iPhone to Mac [Step-By-Step Guide]

If you are looking for the easiest way to AirDrop from iPhone to Mac, you have landed on the right page. Gone are those days where you had to spend hours transferring files from your iPhone to Mac.
Apple has made it easier to transfer various files between iOS devices via AirDrop. If you are working in an iOS environment, AirDrop is a huge time saver.
Through AirDrop, you can transfer photos, notes, videos, and more within a few seconds between iOS devices. The only condition to send and receive files is that the device needs to be close and connected with either Bluetooth or Wi-Fi.
In this article, we will guide you on how to AirDrop from iPhone to Mac within a few simple steps. So, without any delay, let us take a closer look at the transfer process.
How To Airdrop From iPhone To Mac?
Now that you have turned on AirDrop on both iOS devices follow the steps below to AirDrop files from iPhone to Mac.
1. Ensure Compatibility and Turn on Bluetooth/Wi-Fi
Before initiating an AirDrop transfer, it’s essential to check the compatibility of your devices. AirDrop is available on iPhone 5 or later running iOS 7 or later and Mac models introduced in 2012 or later running OS X Yosemite or later.
Additionally, ensure that Bluetooth and Wi-Fi are enabled on both your iPhone and Mac.
- On iPhone: Swipe down from the top right corner to open the Control Center. Ensure both Bluetooth and Wi-Fi icons are blue, indicating they are turned on.
- On Mac: Click on the Wi-Fi and Bluetooth icons in the menu bar at the top right corner of your screen to make sure they are enabled.
2. Enable AirDrop on iPhone and Mac
For successful AirDrop transfers, both your iPhone and Mac should have AirDrop enabled.
— Turning On AirDrop To Send A File From Your iPhone
Before you AirDrop content from your iPhone to Mac, you need to turn on the AirDrop from your iPhone. You can turn on the AirDrop quickly by following the steps below.
- Open Settings on your iPhone.
- Go to General.
Now, go to the AirDrop section, and you will get an option to turn off AirDrop completely, Contacts Only, and Everyone. You can choose the one that is comfortable for you.
— Turn On AirDrop On Mac To Receive Files
Turning on AirDrop on Mac is as simple as it was on iPhone. Here’s what you need to do:
Head to Finder –> Go.
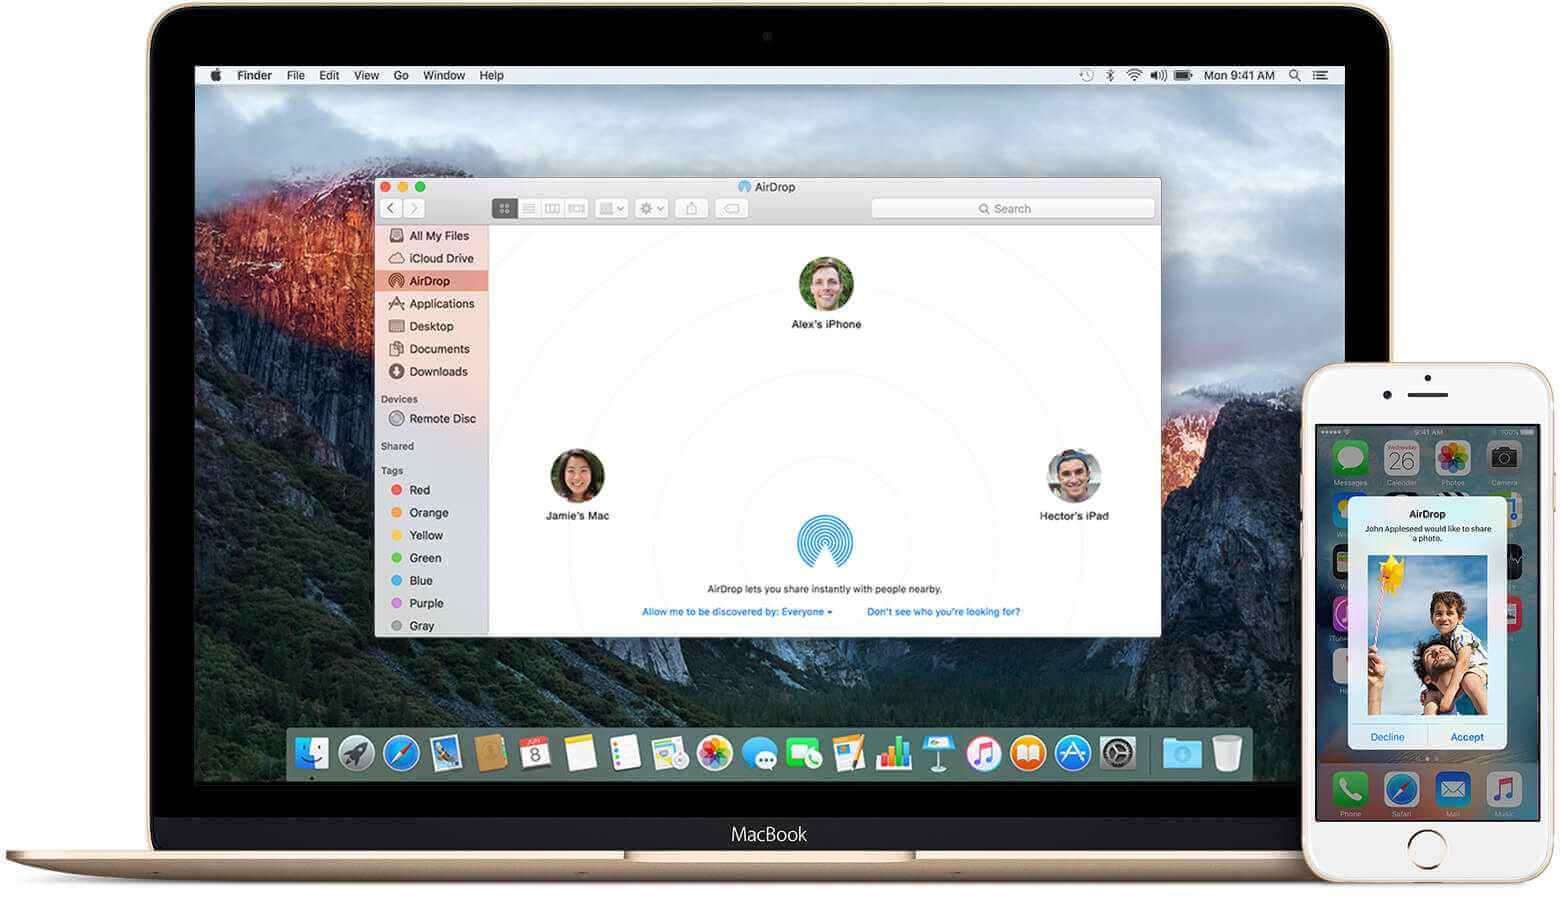
Click on the AirDrop heading. If you have turned off your Wi-Fi or Bluetooth, Mac will ask you to turn it on.
open finder on mac
Now, an AirDrop window will appear. From here, you can choose who can AirDrop you. Select the option according to your preference, and you are all set!
3. Choose the File to AirDrop
Now that AirDrop is enabled on both devices, you can select the file you want to transfer.
- On iPhone: Open the app containing the file you want to share (e.g., Photos, Files, Safari). Locate the file, tap on the Share icon (usually represented by a square with an arrow pointing up), and select the recipient’s device name under the AirDrop section.
- On Mac: Open Finder and click on “AirDrop” in the sidebar. Your Mac will start searching for nearby AirDrop-enabled devices. Once your iPhone appears in the AirDrop window, drag and drop the file onto your iPhone’s icon.
4. Accept the AirDrop on the Recipient Device
After initiating the AirDrop transfer, the recipient device (iPhone or Mac) will receive a notification prompt asking to accept or decline the incoming file.
- On iPhone: A notification will appear on the screen. Tap “Accept” to start the transfer.
- On Mac: A notification will appear on the desktop. Click “Accept” to begin the AirDrop transfer. Step
5. Completion and Verification
Once the file transfer is complete, you will receive a notification on both devices, confirming the successful AirDrop.
The file will transfer via AirDrop from iPhone to Mac within a few seconds. Once the file is received successfully, You can view it on your Downloads folder on the Mac.
Conclusion
Unsurprisingly, AirDrop is the most convenient way to send files between iOS devices. All you need to do is keep the devices nearby and turn on Bluetooth.
So, start AirDropping your files between your iPhone and Mac immediately by following the above steps. We hope you found our article on how to AirDrop from iPhone to Mac useful.
If you need any help, let us know in the comment section below.


