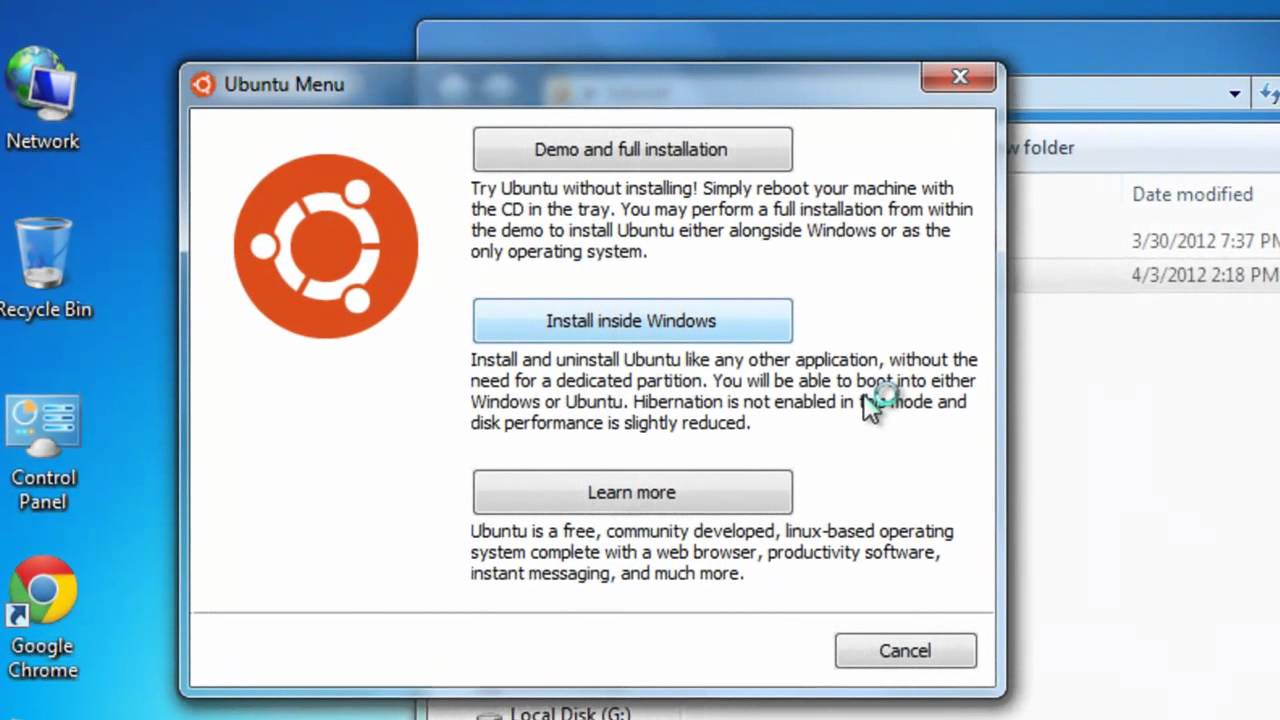
This article on how to Install Ubuntu Inside Windows Using Wubi.
Linux is a most powerful open source operating system used by the application developer, programmer, network engineers, hackers etc. Previously, installing Linux was considered a tough task but now it has become very easy to install Ubuntu inside Windows.
Wubi (Windows-based Ubuntu Installer) was a popular tool that allowed users to easily install Ubuntu Linux alongside their Windows operating system. It was a great option for people who wanted to try out Ubuntu without the hassle of creating separate partitions or dealing with the complexities of dual-booting. However, it’s important to note that from September 2021, Wubi has been discontinued and is no longer officially supported.
In this post we will learn how to install Ubuntu inside Windows using Wubi, Wubi makes Ubuntu installation easier. It is a small application which can be used to install Ubuntu like any other software’s that we install on Windows machine.
To begin with, Ubuntu installation following things are require.
Prerequisites to Install Ubuntu Inside Windows Using Wubi
Before you begin, ensure that you have the following:
- A Windows PC: You’ll need a Windows computer where you want to install Ubuntu alongside the Windows OS.
- Ubuntu ISO: Download the Ubuntu ISO file that you want to install. You can get the latest version from the official Ubuntu website (https://ubuntu.com/download).
- Wubi Installer: Download the Wubi installer. Although it’s no longer officially supported, you might find older versions on community websites. Please ensure you are downloading from a reputable source.
Once you are good to go with the above requirements, then we can process with installing Ubuntu inside Windows using Wubi application.
How to Install Ubuntu inside Windows using Wubi
- Download and Launch Wubi:
- Download and run the Wubi installer on your Windows machine.
- Choose the installation drive where you want to install Ubuntu. This drive should have sufficient free space for the Ubuntu installation.
- Select Ubuntu Version:
- In the Wubi installation window, you can choose the version of Ubuntu you want to install. Browse to the location where you’ve downloaded the Ubuntu ISO file and select it.
- Set Installation Options:
- Choose the installation size for Ubuntu. This determines how much disk space Ubuntu will use on your Windows drive. You can also set a username and password for your Ubuntu installation.
- Installation Location:
- Next, select the installation drive where Ubuntu should be installed. Wubi will create a virtual disk file within your Windows partition to store the Ubuntu file system.
- Install Ubuntu:
- Click the “Install” button to start the installation process. Wubi will extract the Ubuntu files and configure the installation. This may take some time.
- Reboot Your System:
- After the installation is complete, you will be prompted to reboot your computer. When you reboot, you should see an option in the Windows boot menu to select Ubuntu. Choose Ubuntu to boot into your new Ubuntu installation.
- Complete Ubuntu Setup:
- Follow the on-screen instructions to complete the Ubuntu setup, including language, keyboard layout, and user account settings.
- Enjoy Ubuntu on Windows:
- Once the setup is complete, you will have a functional Ubuntu installation running alongside your Windows operating system. You can enjoy all the benefits of Ubuntu without having to create separate partitions or worry about dual-booting.
How to Uninstalling Ubuntu Installed with Wubi
If you ever decide to remove Ubuntu installed using Wubi, you can do so from within Windows.
- Open the Windows Control Panel.
- Go to “Add or Remove Programs” or “Programs and Features.”
- Find “Ubuntu” or “Wubi” in the list of installed programs and click on it.
- Select “Uninstall” to remove the Ubuntu installation.
NOTE: Ubuntu installation inside Windows is supported by Ubuntu 12.10 version, however, the newer version of Linux is also available but it is not supported by Wubi installer for now.
For more amazing articles check out our website Digital Lamp now!
