


In the 21st century, installing a Ring Doorbell is one of the most rewarding projects. This is all because this is the appropriate way that can help you significantly enhance the security of your home. Are you curious to know how to install Ring Doorbell? If yes, you are absolutely in the right place.
Undoubtedly, there is no other way that is as great as to enhance your home security. All you need to know is to follow this step-by-step guide that will enable you to confidently set up your device. It ensures that your Ring Doorbell has been properly installed as well as configured for optimal performance.
One thing that you need to keep in mind is that regular maintenance and paying attention to every issue with your Ring doorbell is a must for its successful installation. And you should have a sigh of relief because the process of installing a Ring Doorbell is more straightforward compared to other procedures. But the thing that matters is it requires careful attention that everything is set up appropriately.
Don’t you want that your Ring Doorbell will provide you with peace of mind for years to come?
Definitely, yes!!!
Let’s dig a little deeper into this blog post, and become familiar with the details that will be beneficial for you in the coming time.
Buckle Up!!
Step-By-Step Process To Install Ring Doorbell
Wanna familiarize yourself with each detail related to Ring Doorbell installation? If yes, we have got you covered. In this section, we have outlined every required step that will lead you toward the procedure of installing your Ring doorbell.
Why are you delaying??
Just, move ahead and walk through the detailed procedure that will let you know how to install Ring Doorbell.
Let’s get started having an overview of the process given below –
Step 1: Gather Your Tools and Materials
Before moving ahead, you need to make sure that you have every required tool as well as material on hand. For your information, most Ring Doorbells come with the following items-
- Ring Doorbell device
- Mounting bracket
- Screwdriver and screws
- Drill bit
- Anchors (for brick or concrete walls)
- Micro USB charging cable (in case the device is rechargeable)
- User manual
In addition to the above-given items, you may need:
- Power drill – It is required if the device is mounting on a hard surface.
- Pencil or marker – With the help of a pencil or marker you can easily mark the drilling spots.
- A level – It will help you ensure that your doorbell is mounted straight.
- A smartphone or tablet with the Ring app installed
Step 2: Charge the Battery (If Applicable)
Do you prefer to use a Ring Doorbell model with a rechargeable battery? If yes, you are required to charge the battery 100% fully before installation. Here are the steps to guide you charge the battery –
– Connect the Charging Cable
First of all, plug the micro USB cable into the charging port on the back of the doorbell. And you need to make sure that the other end of the cable should be connected to a power source, such as – a USB wall charger on your computer.
– Wait for the Battery to Charge
Now, the ring around the doorbell button will surely light up during charging. As soon as the light turns off, you should make sure that the battery is fully charged and prepared for installation.
Step 3: Download the Ring App and Set Up Your Account
It can not be denied that the Ring app is essential for setting up and managing your Ring Doorbell. It’s available for both iOS and Android devices.
– Download the App
Initially, go to the App Store (iOS) or Google Play Store Android). Now, search for the “ring” app. Later on, you can download and install it on your device.
– Create or Log into Your Ring Account
In the next step, open the app. If you are a new user, choose “Create Account”. Now, follow the prompts. In case, you already have a Ring account, you have to log in with the use of the correct login credentials.
– Set Up the Device
In the app, choose “Set up a Device”. After that, you have to select “Doorbells” from the list of devices. Thereafter, follow the in-app instructions that will enable you to connect your Ring Doorbell to your Wi-Fi network. Finally, you can ensure that your smartphone or tablet is connected to the same Wi-Fi network that you were willing to use for Ring Doorbell.
Step 4: Choose the Mounting Location
Do you want an optimal performance for your Ring doorbell? Well, it is a must for you to choose the right location for your Ring Doorbell. For this, the steps that you have to follow are –
– Identify the Ideal Spot
In the first step, you should confirm that the doorbell is placed at chest height. It is approximately 48 inches from the ground. The doorbell ought to be positioned to capture a wide field of view. So, make sure that the location is within range of your Wi-Fi signal.
– Check for Power Supply
Suppose, your Ring Doorbell is hardwired, so you have to confirm that the location is close to the existing doorbell wiring. If it is not, you will have to drill holes to run the wiring or opt for battery-powered operation.
– Use a Level
Last but not least, hold the mounting bracket against the wall. Now, use a level to ensure that it’s completely straight. Once it is properly aligned, mark the drilling spots with a pencil.
Step 5: Install the Mounting Bracket
Have you already marked the appropriate location? If so, it is the right time to install the mounting bracket. Let’s have a glance at the process of the successful installation of the mounting bracket –
– Drill Pilot Holes
You need to use a drill that matches the size of the screws. Next, drill pilot holes at the spots where you have already been marked. If you are going to install the doorbell on brick, stucco, or concrete, you need to use the provided anchors.
– Install the Anchors
If you require anchors, tap them into the drilled holes with a hammer. You have to do it until they are flush with the wall.
– Attach the Mounting Bracket
In the next step, align the mounting bracket with drilled holes or anchors. You have another option to use the screws that are given to secure the bracket to the wall. Make sure that the bracket is firmly attached and leveled.
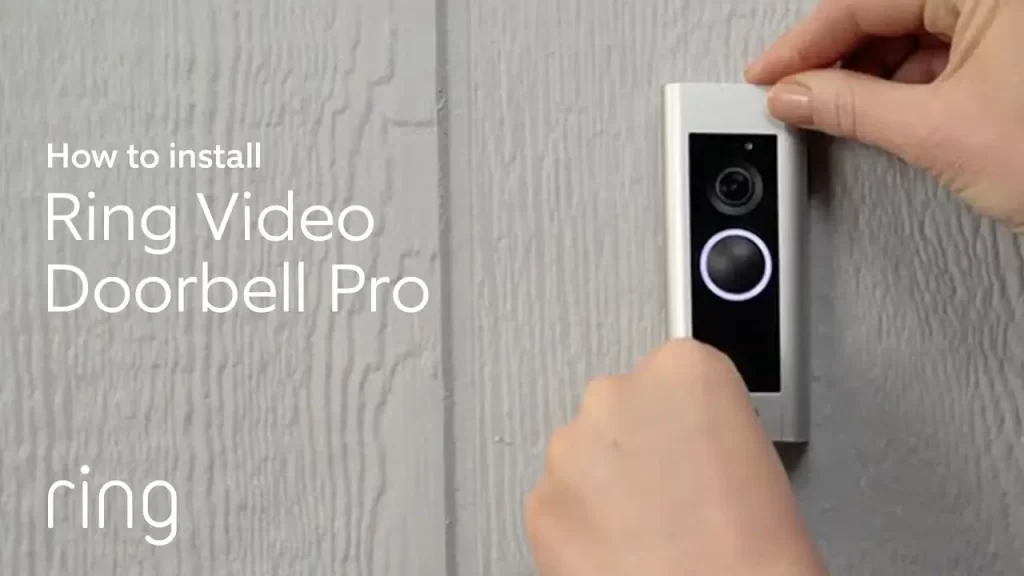
Step 6: Attach the Doorbell to the Mounting Bracket
If the bracket is securely placed, now is absolutely the right time to attach the Ring Doorbell. Below are the steps that will help you attach the Ring Doorbell in a perfect manner.
– Align the Doorbell
At the beginning of the process, hold the doorbell against the mounting bracket. Next, ensure that the hooks on the bracket align with the slots on the back of the doorbell.
– Secure the Doorbell
Once the doorbell is perfectly aligned, slide the doorbell down until it clicks into place. There are a few models that require you to secure the doorbell with additional screws at the bottom. For this, you prefer to use the security screws that are provided to you for additional security.
Step 7: Hardwire the Doorbell (Optional)
Are you going to replace an existing wired doorbell? It will be worth hardwiring your Ring Doorbell to keep the battery charged.
In this step, we have outlined every step that is essential for you for a successful Ring Doorbell installation. Let’s have an all-seeing eye on these steps –
– Turn Off Power
Before going to handle any wire, turn off the power to your existing doorbell from the circuit breaker. It will help you to avoid electrical shock.
– Disconnect the Old Doorbell
Now, you have to remove the old doorbell from the wall. Later on, disconnect the wires.
– Connect the Wires to the Ring Doorbell
Undoubtedly, the Ring Doorbell will have two terminals on the back. So, all you need to do is connect the wires to these terminals. Next, secure them with the screws. You need not worry about the wires. No matter which wire goes to which terminal.
– Test the Connection
Once you connect the wires, you have to turn the power back on. Now, you need to check the Ring app to see if the device is receiving power or not.
– Secure the Doorbell
Finally, after the completion of the wiring, finish securing the Ring Doorbell to the mounting bracket. You can do it according to the details mentioned in the previous step.
Step 8: Finalize the Setup in the Ring App
Now that you have physically installed your doorbell, it is time to accomplish the setup in the Ring app. For this, the steps to follow are –
– Check the Video Feed
Initially, open the Ring app. After that, test the live video feed that will help you ensure the doorbell is functioning properly. In addition to this, you can also adjust the angle of the camera if it is required.
– Set Up Motion Detection
The Ring Doorbell involves easy-to-customized motion detection zones. In the app, go to “Motion Settings.” Now, adjust the zones so that you can easily avoid unwanted alerts from passing cars, pedestrians, or animals as well.
– Set Up Notifications
In the next step, customize your notification preferences in the app. You have the option to receive alerts for motion, doorbell rings, or both.
– Test the Doorbell
After that, press the doorbell button so that you can ensure it rings both at the doorbell and on your smartphone. You also need to confirm that you are receiving the appropriate notifications. Along with this, also verify that the video feed activities are as per your expectations.
Step 9: Add Shared Users (Optional)
Would you like other members of your household to have access to the Ring Doorbell? If so, you can add them as shared users. For this, the steps to follow are –
– Go to Shared Users
At the beginning of the process, in the Ring app, choose the doorbell. After that, select “Shared Users.”
– Add a New User
Now, enter the email address of the person that you are willing to add as well as send an invitation. Now, the person will receive an email with instructions regarding the process of accepting the invitation and setting up access.
Step 10: Maintenance and Troubleshooting
To verify that your Ring Doorbell is continuously functioning properly, it is crucial for you to perform regular maintenance. Next, troubleshoot any issues that arise.
– Clean the Camera Lens
Initially, keep the camera lens clear so that you can maintain a clear video feed. Now, wipe it with a soft, dry cloth as per your requirement.
– Check Battery Life
Suppose, your Ring Doorbell is battery-operated, monitor the battery level in the Ring app. You can also think about recharging it when it is required. Further, the app will notify you when the battery is low.
– Update Firmware
Generally speaking, Ring periodically releases firmware updates. It helps you bring improvements in the performance as well as security. So, you need to make sure that your device stays up-to-date. For this, you need to enable automatic updates in the app.
– Troubleshoot Common Issues
In case you are experiencing issues such as – poor video quality, connection issues, or delayed notifications, it will be worth consulting the troubleshooting section in the Ring app. Otherwise, you can visit the ring support website for help.
Final Words
Hopefully, the information given in this post will help you know how to install Ring Doorbell. This way, it will become easy for you to install the device and run it in the smoothest manner.
Installing a Ring Doorbell isn’t just a tech upgrade — it’s a move toward a more secure, smarter home. With proper planning and this step-by-step guide, you can install it confidently, whether you’re tech-savvy or a complete beginner.
By understanding the nuances of the model you’ve chosen and following best practices, you’ll ensure your doorbell works efficiently, providing safety and convenience for years to come.